|
Growing Potatoes In Your Patch
|
How Do I Start?
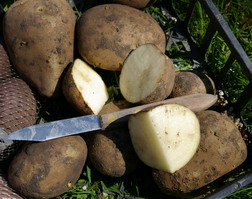
Well you could use the potato above but buying certified seed potatoes will get you two things. A much bigger choice of varieties and that’s the major reason for growing your own. The “certified” means that they were grown from special stock under special conditions in an attempt to eliminate the viruses and diseases that often contaminate field grown potatoes. You can plant the whole potato or cut it up into smaller pieces to create even more plants.

Where Do I Cut?
A useful piece of potato needs two things. It must have a few ‘eyes’, that’s the growing points that turned into the sprouts on your basement potatoes. It needs to be big enough to provide nourishment to the developing sprout until it develops its own roots. A piece about the size of a golf ball would be a good measure. It’s shape doesn’t matter. However you need to cut up the larger potato to include some eyes on each smaller piece.
 How Do I Plant It?
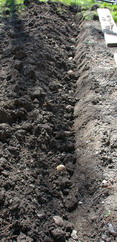
Dig a trench about 4" / 10cm deep and long enough to accommodate all of your pieces of potato, spacing them about 12" / 30cm apart with the cut surface facing down and the eye up. A version of the old sod laying axiom, “green side up.” Rake about 2" / 5cm of soil back over the top of the potato pieces.

As the shoots start to grow continue to pull more soil around the base of the growing shoots until that have at least 6" / 15cm of soil piled around them. Later in the season you can pull even more soil around the stems to keep the developing potatoes covered. The actual potatoes should never be exposed to direct sunlight.
Food And Water?
Potatoes are heavy feeders and do much better with liberal applications of compost or granular fertilizer. This should be added after the pieces are in the ground and covered so that they don’t come into direct contact with the fertilizer. A commercial fertilizer such as 14 28 7 or with numbers in about the same proportions, is best. When the actual tubers are developing , after the plants have flowered, they need a good and continuous supply of moisture. You may have to turn on the sprinkler if mother nature does not cooperate. Soaking well once a week is far better than frequent light waterings. The water does have to get down through all of that soil we have been piling up around the plants.
My Favourite Trick!
When the plants have finished flowering and are growing well, I gently dig around the base of the plants to see if I can find a few small tubers. I gently remove these for an early taste treat. Carefully cover up the plant, just as you found it and let it continue to grow and develop the rest of its tubers. The whole plant can be dug up and harvested later in the season as the tops begin to fade.

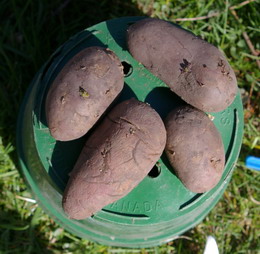
Enjoy the varied tastes, textures and colours such as in this intriguing variety, French Fingerling, of this easy garden vegetable.
Get answers to your gardening questions by subscribing to
Ken’s free newsletter, Dallying In The Dirt
return from Growing Potatoes to Vegetables main page
